Introduction
Creating a DIY bookshelf is not only rewarding but also a wonderful way to add style and functionality to your home. Whether you are a seasoned DIY enthusiast or a beginner, building your own bookshelf can be a fulfilling project. This guide will walk you through the entire process, from planning and selecting materials to assembling and finishing your bookshelf. By the end of this guide, you’ll have a beautiful and sturdy bookshelf to showcase your favorite reads and treasures.
Planning Your Bookshelf
Determine the Size and Location
The first step in creating your DIY bookshelf is planning. Consider where you want to place your bookshelf and measure the available space. Determine the height, width, and depth of the bookshelf based on the space and your storage needs. It’s essential to ensure that your bookshelf fits comfortably within the designated area without obstructing pathways or other furniture.
Choose a Style
Decide on the style of your bookshelf. You might opt for a minimalist modern design, a rustic farmhouse look, or a classic traditional style. The design will influence the type of wood and finish you choose, as well as the overall construction method.
Sketch the Design
Create a rough sketch of your bookshelf, including the number of shelves and their placement. Consider the types of items you’ll store, as heavier items may require thicker shelves or additional support. Having a visual reference will guide you through the building process and ensure that your design is feasible.
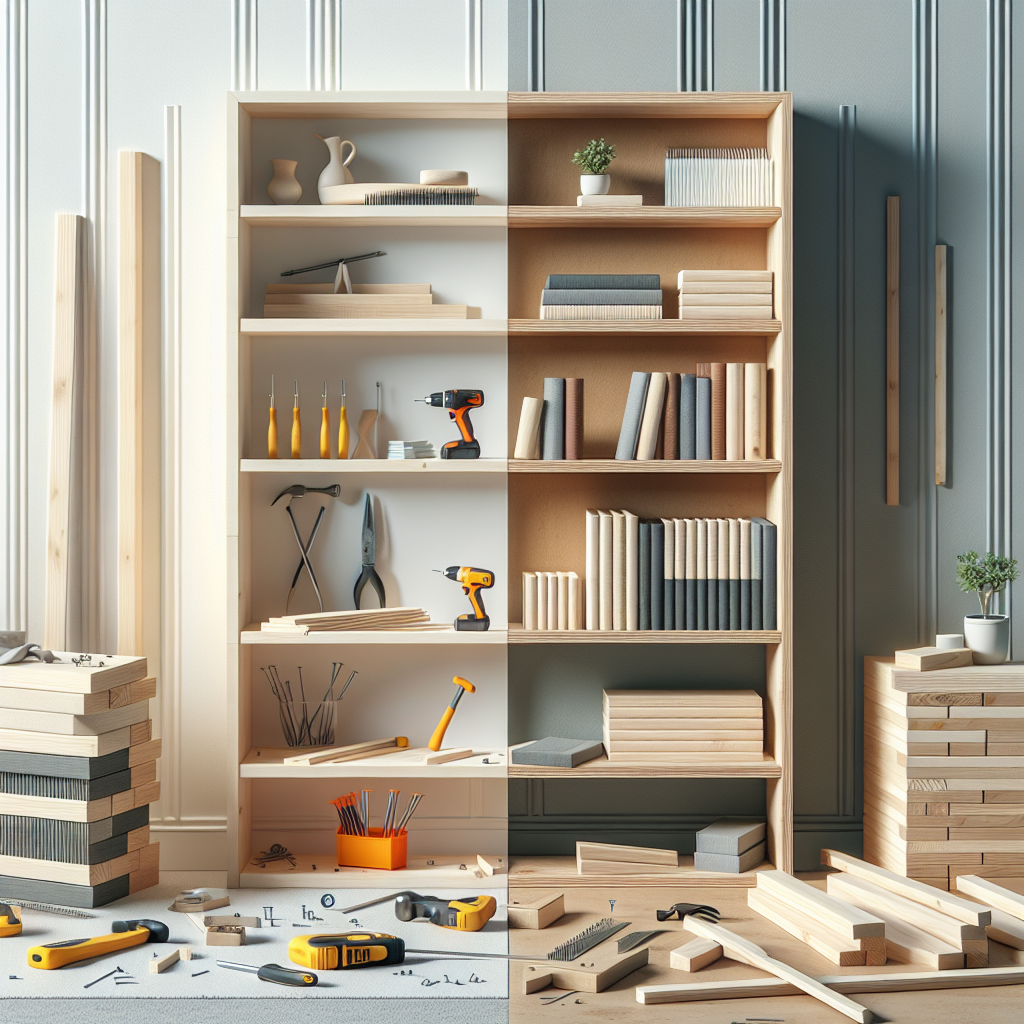
Gathering Materials and Tools
Select the Right Wood
The choice of wood is crucial for the durability and appearance of your bookshelf. Popular options include pine for a budget-friendly and easy-to-work-with material, oak for a classic and durable choice, and plywood for a more modern look. Ensure the wood is straight and free from defects.
Materials Needed
- Wood (as per your design specifications)
- Wood screws
- Wood glue
- Sandpaper (various grits)
- Wood stain or paint
- Primer (if painting)
- Sealant (optional)
Tools Required
- Measuring tape
- Carpenter’s square
- Drill
- Screwdriver
- Jigsaw or circular saw
- Sander
- Paintbrush or roller
Building the Bookshelf
Cutting the Wood
Using your design as a reference, measure and mark the wood for cutting. Double-check all measurements to ensure accuracy. Use a jigsaw or circular saw to cut the wood to the required dimensions. It’s recommended to cut all pieces at once to maintain consistency.
Assembling the Frame
Start by assembling the outer frame of the bookshelf. Use wood glue and screws to join the sides to the top and bottom panels. Ensure that all corners are square using a carpenter’s square. Clamps can be used to hold pieces together while the glue dries.
Attaching the Shelves
Position the shelves according to your design. Drill pilot holes to prevent the wood from splitting and use screws to secure each shelf in place. If your bookshelf is tall, consider adding a back panel for additional stability. This can be attached using wood glue and nails or screws.
Finishing Touches
Sanding
Once the assembly is complete, sand the entire bookshelf to smooth out any rough edges or surfaces. Start with a coarse grit sandpaper and gradually move to a finer grit for a smooth finish. Be sure to sand in the direction of the wood grain.
Painting or Staining
Depending on your desired finish, you can either paint or stain your bookshelf. If painting, apply a coat of primer first to ensure even coverage. Once dry, apply your chosen paint using a brush or roller. For a stained finish, apply wood stain with a brush or cloth, following the grain of the wood. Allow it to penetrate the wood for a richer color and wipe off any excess.
Sealing the Wood
After painting or staining, consider applying a clear sealant to protect the wood and enhance its longevity. Options include polyurethane for a glossy finish or tung oil for a more natural look. Follow the manufacturer’s instructions for application and drying times.
Final Assembly and Installation
Reinforcing the Structure
For additional stability, especially if your bookshelf is tall or will hold heavy items, reinforce it by installing L-brackets at the corners or attaching it to the wall using anchors. This will prevent the bookshelf from tipping over.
Positioning the Bookshelf
Carefully move the bookshelf to its designated spot. If your design includes adjustable shelves, adjust them as needed to accommodate your items. Take care when moving the bookshelf to avoid damaging the finish.
Conclusion
With patience and attention to detail, you can create a stylish and functional bookshelf that complements your home decor. Building a DIY bookshelf not only saves money but also allows you to customize every aspect, from size and style to finish. Whether you’re displaying books, plants, or decorative items, your handcrafted bookshelf will be a testament to your creativity and craftsmanship. Enjoy the satisfaction of a job well done and the beauty of your new piece of furniture.
#ChatGPT assisted in the creation of this article.